Quick Fixes for Watercolor Paper Buckling
Are you struggling with the frustrating issue of watercolor paper buckling? You’re not alone! In this guide, we’ll explore the causes of this pesky problem and provide quick fixes to help you overcome it.
Table of Contents
- Choose the Right Watercolor Paper
- Properly Stretch Your Watercolor Paper
- Tape Down Your Paper Edges
- Use Glued Pads
- Experiment with Alternative Painting Surfaces
- Fixing Buckled Watercolor Paper After Painting
- Conclusion
Choose the Right Watercolor Paper
Choosing the right paper can be overwhelming for a watercolor beginner, especially with many options. But don’t worry; I’m here to help you navigate this essential step in your watercolor journey!
When I first started painting with watercolors, I quickly realized that the quality of the paper plays a significant role in the outcome of my artwork. Using low-quality paper often led to buckling and made it difficult to achieve the desired effects. So, investing in high-quality watercolor paper is crucial for preventing buckling and improving your overall painting experience.
There are three main types of watercolor paper: hot-pressed, cold-pressed, and rough. Each type has its unique texture and characteristics:
- The hot-pressed paper has a smooth surface, which is excellent for detailed work and fine lines. However, it can be challenging for beginners as it tends to dry quickly, giving you less time to work with your paint.
- The cold-pressed paper has a slightly textured surface and is the most popular choice among watercolor artists. It’s beginner-friendly and versatile, allowing for various techniques and effects.
- Rough paper has a heavily textured surface, perfect for creating expressive, loose strokes and granulation effects. It may be more challenging for beginners, but it’s worth experimenting with as you progress in your watercolor journey.
Another essential factor to consider is the weight of the paper. Watercolor paper weight is measured in grams per square meter (gsm) or pounds per ream (lb). I recommend using paper weighing at least 300 gsm (140 lb) to minimize buckling. Thicker paper can handle more water and is less likely to warp.
In my early days of watercolor painting, I tried using lighter-weight paper to save money, but I quickly learned that it wasn’t worth the frustration and disappointment. Investing in good-quality, heavier watercolor paper has made a world of difference in my artwork and has helped me avoid the buckling issue. Here are my favorite watercolor papers.
Properly Stretch Your Watercolor Paper
Stretching your watercolor paper involves pre-soaking it and attaching it to a rigid surface, allowing it to dry flat and remain stable during painting. This helps prevent buckling and warping, even when using a lot of water in your artwork. Here’s a step-by-step guide on how to stretch your watercolor paper:
- Soaking the paper: Fill a clean, large container, or your bathtub, with a few inches of cool water. Submerge your watercolor paper completely, ensuring it’s evenly soaked. Soak 300 gsm (140 lb) paper for 3-5 minutes. Adjust the soaking time depending on the weight of your paper – lighter paper requires less time, while the heavier paper may need a bit longer.
- Attaching the paper to a rigid surface: Prepare a sturdy board slightly larger than your paper. Remove the paper from the water and gently place it on a clean, flat surface. Use a sponge or clean cloth to remove excess water from the paper’s surface. Then, carefully lift the paper and place it onto the board. Smooth out any air bubbles or wrinkles using a clean cloth or your hands.
- Allowing the paper to dry: To secure the paper to the board, use gummed paper tape or staples around the edges, ensuring it’s tight and even. Allow the paper to dry completely before you start painting. This may take a few hours or even overnight, depending on the humidity and temperature of your environment.
It felt like a time-consuming process when I started stretching my watercolor paper. But after seeing the difference in my artwork, I realized it was well worth the effort. Plus, with practice, I became more efficient at it!
Tape Down Your Paper Edges
In this section, I’ll share my tips and tricks for taping down your paper edges to ensure a successful watercolor painting experience:
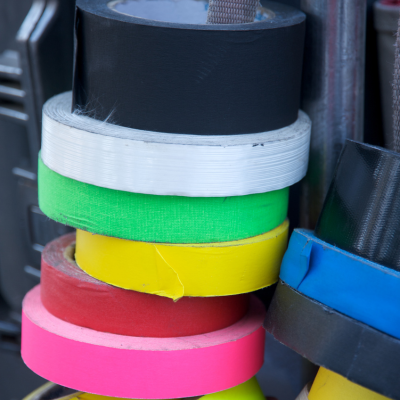
- Choose the suitable tape: Not all tapes are created equal. I recommend using low-tack painter’s or artist’s masking tape, as they’re designed to be easily removable without damaging your paper. Avoid using regular masking or duct tape, as they can be too sticky and tear the surface of your paper when removed. No matter what brand you’re using, you should always test your tape WITH the paper you’re using. Some tapes work well on some kinds of paper and will tear others.
- Prepare your paper: Before taping it down, ensure it’s clean and free of dust or debris. If you’re using watercolor paper with a rough or textured side, decide which side you’d like to paint on (I prefer the textured side for most of my paintings) and place it facing up.
- Tape the edges: Cut four pieces of tape to match the length of each side of your paper. Align the edge of the tape with the edge of the paper, and press it down firmly, ensuring it adheres evenly to both the paper and the surface beneath. I like to leave a small gap between the edge of the paper and the tape, which creates a thin white border around my finished painting.
- Secure your paper to a flat surface: To prevent your paper from buckling or warping while painting, it’s essential to tape it down to a flat, sturdy surface. I usually tape my paper to a drawing board, but you can also use a foam board, a wooden board, or even a thick piece of cardboard. Ensure your surface is clean and free of any residue that could transfer onto your painting.
- Remove the tape carefully: Once your painting is completely dry, it’s time to remove it. To avoid tearing your paper, gently and slowly peel the tape off at a 45-degree angle. If you’re having trouble removing the tape or sticking too much, try using a hairdryer to warm the adhesive slightly, making it easier to peel off.
Use Glued Pads
You could buy a watercolor pad with four glued edges. It’s the easiest way to have flat paper when painting. However, you’re limited by the sizes of the pads. It’s very convenient but a bit tricky to remove the paper. You have a part on the side without glue where you can insert a tool to separate the sheet of paper from the glue. I’m using a silicone wedge to do this, as it won’t damage the paper.

Experiment with Alternative Painting Surfaces
In this section, I’ll share some of my favorite non-traditional surfaces for watercolor painting and encourage you to experiment with them.
- Canvas: Yes, you can paint with watercolors on canvas! Some canvases are specifically designed to absorb and hold watercolor paint, allowing you to create beautiful, vibrant paintings similar to those on paper. I love the texture and feel of painting on canvas, and it’s a great option if you want to create a larger piece or display your artwork without framing.
- Wood: Painting on wood can add a unique, rustic charm to your watercolor art. I recommend using light, untreated wood like birch or basswood, as they have a smooth surface and absorb watercolor well. Before painting, apply a coat of watercolor ground (a special primer for watercolor) to help the paint adhere better. The wood’s natural grain can create interesting textures and effects in your painting.
- Yupo paper: Yupo is a synthetic, non-porous paper made from polypropylene. Because it doesn’t absorb water, painting on Yupo creates an entirely different experience than traditional watercolor paper. The paint stays on the surface and takes longer to dry, allowing you to play with blending and creating unique effects. Painting on Yupo is a fun and exciting way to experiment with watercolor techniques.
- Ceramic: Painting on ceramic surfaces like tiles or plates can be a fantastic way to create unique, functional art pieces. I recommend using a watercolor ground to prime the ceramic surface before painting. Once dry, you can seal your artwork with a clear, non-toxic varnish to protect it from wear and tear.
Experimenting with alternative painting surfaces has allowed me to push the boundaries of my watercolor art and discover new ways to express my creativity. I encourage you to try some of these surfaces and see how they can enhance your watercolor journey.
Fixing Buckled Watercolor Paper After Painting
We’ve all been there: you’ve just finished a beautiful watercolor painting, only to find that the paper has buckled and warped. It can be frustrating, but don’t worry – I’ve also experienced this and discovered some techniques to help fix buckled watercolor paper after painting.
- Ironing: One of the methods I’ve used to fix buckled paper is ironing. Before trying this, ensure your painting is completely dry. Set your iron to the lowest heat setting (no steam) and place a clean, white cloth or a piece of parchment paper over your painting to protect it. Gently iron the back of your painting, moving the iron in circular motions. Check your progress frequently to avoid overheating or damaging your artwork.
- Pressing: Another technique to flatten buckled paper is pressing. Place your dry painting between two sheets of clean, acid-free, or wax paper. Then, put it between two heavy, flat objects like large books or wooden boards. Add some weight on top (more books or a dumbbell, for example) and let it sit for a day or two. This should help to flatten your painting gradually.
- Spraying and stretching: If your paper is heavily buckled, try spraying the back of your painting with water and stretching it. Lay your painting face down on a clean surface and mist the back with water. Be careful not to soak the paper, as it can cause the paint to reactivate and bleed. Once the back is slightly damp, tape the edges of your painting to a flat, rigid surface (like a wooden board) using low-tack painter’s or artist’s masking tape. Allow it to dry completely before removing the tape.
To prevent future buckling, consider the following tips:
- Use heavier paper: Thicker watercolor paper (300gsm/140lb or heavier) is less likely to buckle than thinner paper. Investing in high-quality, heavy watercolor paper can save you the trouble of fixing buckled paintings later.
- Stretch your paper: Stretching your paper before painting can help minimize buckling. Soak your paper in water for a few minutes, then tape it to a flat surface (like a drawing board) using low-tack or gummed tape. Allow it to dry completely before painting.
- Tape down your paper: As I mentioned earlier, taping down the edges of your paper to a flat surface can help keep it flat while you paint. Be sure to use low-tack painter’s or artist’s masking tape to avoid damaging your paper when removing the tape.
Don’t let buckled paper discourage you – with these techniques, you can rescue your artwork and continue to create beautiful watercolor paintings.
Conclusion
I hope the tips and techniques I’ve shared have been helpful and inspiring for you. Whether you’re a beginner just starting or an experienced artist looking to expand your skills, remember that the key to success in watercolor painting is practice, patience, and a willingness to learn from your mistakes. Embrace the unpredictable nature of watercolors and allow yourself to grow as an artist.
As you continue your watercolor journey, remember I’m here to support and guide you. For more tips, tutorials, and inspiration, visit my other watercolor articles on my blog, YouTube channel, and social media pages. And if you’re interested in taking your art skills to the next level, consider enrolling in my art classes or joining my art membership, where we have watercolor and gouache tutorials.
Happy painting!