6 Ways to Fix Watercolor Mistakes
Watercolor can be an unpredictable medium, and even the most experienced artists occasionally face challenges. I’ll share six ways to fix watercolor mistakes that will make you turn your mistakes into beautiful works of art in no time.
Get ready to unlock the secrets of correcting watercolor mistakes, from lifting wet and dry paint to glazing, layering, and more!
Table of Contents
- Lifting Wet Paint
- Lifting Dry Paint
- Scrubbing and Erasing
- Glazing and Layering
- Using Gouache or Opaque Watercolor
- Embracing Your Mistakes
- Conclusion
A word of caution: I assume you know the basics of watercolor painting, and you’re using quality watercolor paper that can be rubbed and harmed a bit!
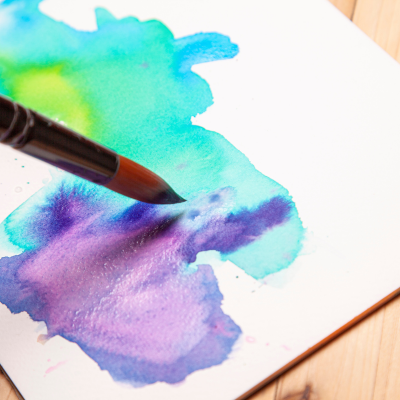
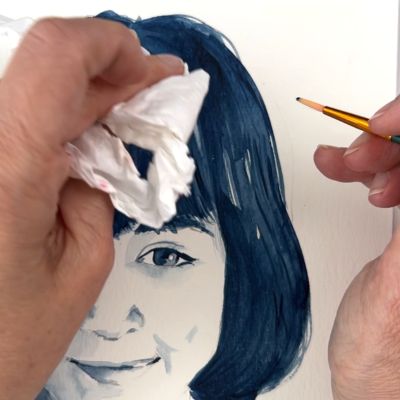
Lifting Wet Paint
Lifting wet paint is removing or lightening paint while still wet or damp, allowing you to correct errors or even create unique effects in your painting.
To effectively lift wet paint, you’ll need a few essential tools and materials:
- Clean water
- A soft, absorbent brush (synthetic or natural)
- Paper towels or a clean, lint-free cloth
- Tissue (optional)
Step-by-step guide to lifting wet paint
- Dip your clean brush in water and gently remove any excess on the edge of your water container.
- Carefully touch the tip of the brush to the area you want to lift the paint from, allowing the water to loosen the paint.
- As the paint begins to dissolve, gently dab the area with a clean paper towel or cloth, being careful not to rub the paper’s surface.
- Repeat steps 2 and 3 until you achieve the desired effect.
- Use a tissue to absorb any residual moisture from the paper if necessary.

Tips and tricks for effective lifting
To make the most of this technique, keep these helpful tips in mind:
- Work quickly but gently to avoid damaging the paper surface.
- Be patient and lift the paint gradually, as trying to remove too much at once may cause the paper to tear or become overly saturated.
- If you aim for a subtle effect, consider using a smaller brush and applying minimal pressure.
- Experiment with different brush sizes and shapes to find the best one for your needs.
Lifting Dry Paint
If you’re like me, you’ve probably found yourself staring at a watercolor painting, wishing you could fix an area where the paint has already dried.
Lifting dry paint is a technique that allows you to remove or lighten dry watercolor paint, allowing you to correct mistakes, modify areas, or add new elements to your artwork.
To successfully lift dry paint from your watercolor piece, you’ll need the following tools and materials:
- Clean water
- A stiff brush, preferably synthetic
- Paper towels or a clean, lint-free cloth
- A sponge or magic eraser (optional)
Step-by-step guide to lifting dry paint
Here’s a step-by-step guide to help you master the art of lifting dry paint:
- Moisten your stiff brush with clean water, removing any excess water on the edge of your container.
- Gently scrub the area from which you want to lift the paint, applying enough pressure to loosen the dried paint but not enough to damage the paper.
- Dab the area with a paper towel or cloth to absorb the lifted paint particles as the paint dissolves.
- Repeat steps 2 and 3 until you achieve the desired effect.
- Allow the paper to dry completely before applying new paint or making additional adjustments.
Practicing this technique on scrap paper is always a good idea before attempting it on your final artwork!
Tips and tricks for effective lifting
- Be patient and lift the paint gradually, as overworking the paper can cause damage or pilling.
- When scrubbing, use a light touch to avoid tearing or roughing the paper surface.
- If the paint is particularly stubborn, consider using a sponge or magic eraser to gently lift the paint without harming the paper.
- Experiment with different brush sizes and shapes to find the best one for your needs.
Scrubbing and Erasing
Sometimes, watercolor mistakes require a bit more elbow grease to fix. That’s when scrubbing and erasing come into play! This technique involves using a brush or eraser to remove paint from your artwork. Trust me. It’s a lifesaver!
You’ll need the following tools and materials:
- Clean water
- A stiff brush, preferably synthetic
- A white vinyl or gum eraser
- Paper towels or a clean, lint-free cloth
Step-by-step guide to scrubbing and erasing watercolor paint
- If using a brush, moisten it with clean water, and remove any excess water on the edge of your container. If using an eraser, ensure it’s clean and free of debris.
- Gently scrub or erase the area from which you want to remove paint, applying enough pressure to loosen the paint but not enough to damage the paper.
- As the paint begins to lift, dab the area with a paper towel or cloth to absorb the removed paint particles.
- Repeat steps 2 and 3 until you achieve the desired effect.
- Allow the paper to dry completely before applying new paint or making additional adjustments.

Tips and tricks for effective scrubbing and erasing
To get the best results when scrubbing and erasing, keep these handy tips in mind:
- When scrubbing or erasing, use a light touch to avoid damaging the paper surface.
- Be patient and work gradually, as overworking the paper can cause damage or pilling.
- When using an eraser, choose a gentle one on the paper, such as a white vinyl or gum eraser.
- Experiment with different brush sizes and shapes to find the best one for your needs.
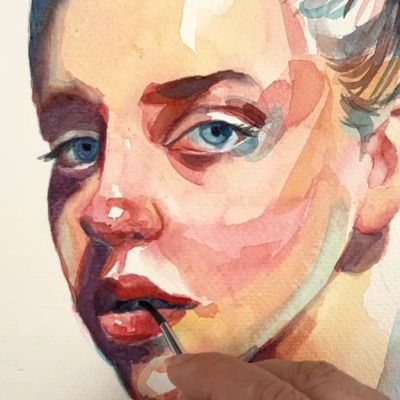
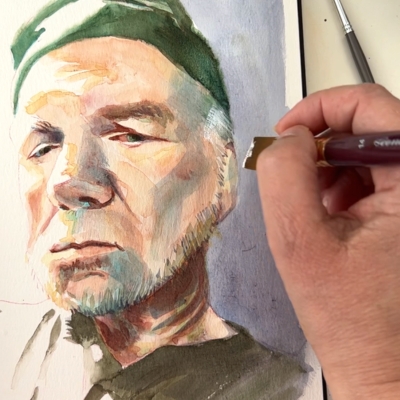
Glazing and Layering
Sometimes, the best way to fix or enhance a watercolor painting is by adding more rather than removing it. That’s where glazing and layering come in! Glazing applies a thin, transparent layer of paint over a dried area, while layering involves building multiple layers of paint to achieve the desired effect.
You’ll need the following:
- Watercolor paint
- Clean water
- A soft, round brush (synthetic or natural)
- Watercolor paper (preferably 100% cotton)
Step-by-step guide
- Ensure the area you’re working on is completely dry before beginning.
- Mix your desired color with water, creating a transparent wash.
- Dip your brush in the wash, and gently remove any excess paint on the edge of your palette or container.
- Apply the wash in smooth strokes, careful not to disturb the underlying paint.
- Allow the layer to dry completely before applying additional layers or making further adjustments.
- Repeat steps 2-5 as needed to achieve your desired effect.

Tips and tricks for effective glazing and layering
- Be patient and allow each layer to dry completely before applying the next one to prevent bleeding or unwanted color mixing. Make sure it’s dry to the bone! Use a hair dryer if needed (if you’re impatient like me).
- Use a soft brush to minimize brush strokes and create a more even glaze.
- Experiment with different color combinations and layering orders to achieve unique effects.
- Remember that watercolor dry lighter than they appear when wet, so don’t be afraid to build up multiple layers to achieve the desired intensity.
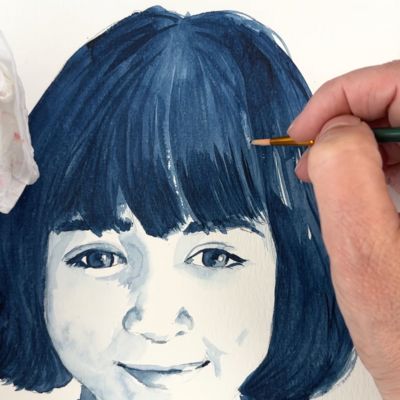
Using Gouache or Opaque Watercolor
Incorporating gouache into your watercolor paintings can create stunning effects, add depth, and enhance details. Some people may say it’s cheating, but there is no such thing as cheating in art, only tools and techniques to achieve what you have in mind.
You’ll need the following:
- Gouache paint
- Clean water
- A variety of brushes, such as round, flat, and detail brushes (synthetic or natural)
- A palette for mixing colors
- Watercolor paper (preferably 100% cotton)
Step-by-step guide
- Choose the area of your painting where you want to apply gouache or opaque watercolor.
- Squeeze a small amount of gouache paint onto your palette.
- Mix the gouache paint with a small amount of water to achieve the desired consistency. Use less water for more opacity; use more water for more transparency.
- Dip your brush into the mixed paint and apply it to your painting, using the appropriate brush and technique for the desired effect.
- Allow the paint to dry, make necessary adjustments, or add additional layers.
Tips and tricks for effective use of gouache or opaque watercolor
Keep these tips in mind to get the best results when using gouache or opaque watercolor:
- Start with a light touch when applying gouache or opaque watercolor, as adding more layers is easier than removing them.
- Use a separate palette for mixing gouache or opaque watercolor to avoid unintentional color contamination.
- Experiment with different brush types and techniques to achieve various effects, such as dry brushing for texture or glazing for depth.
- Remember that gouache dries to a matte finish, which can affect the overall appearance of your painting.
- Gouache has a shift in value when drying. Allow the paint to dry before adding another layer.
Embracing Your Mistakes
Art is a journey, and mistakes are an inevitable part of the process and are what make us grow as artists.
Turning mistakes into creative opportunities
Mistakes can often lead to breakthroughs and new ideas. Here are some ways to turn your mistakes into creative opportunities:
- Evaluate the mistake and consider how it could be incorporated into your painting as a unique feature or effect.
- Use the mistake as a learning experience to improve your technique or approach to watercolors.
- Challenge yourself to think outside the box and find a way to work around the mistake, possibly leading to innovative solutions.
Remember, embracing mistakes can open up new possibilities and help you grow as an artist.
Tips for maintaining a positive attitude while working with watercolors
Staying positive when working with watercolors can help you embrace mistakes and enjoy the creative process. Here are some tips for maintaining a positive attitude:
- Acknowledge that mistakes are a natural part of the artistic process and can lead to growth and development.
- Focus on the journey rather than the destination, enjoying the creative process and learning from each painting.
- Surround yourself with a supportive community of fellow artists who can offer encouragement, advice, and constructive feedback.
Conclusion
In conclusion, fixing watercolor mistakes is a skill that every artist should embrace and develop. As a fellow watercolor enthusiast, I understand the challenges and frustrations that can come with this medium. However, learning to fix and even incorporate mistakes into your work can lead to exciting new creative possibilities and personal growth.
Throughout this article, we’ve explored six ways to fix watercolor mistakes, tools, and tips to help you overcome common watercolor mistakes. Remember that practice makes perfect, and the more you work with watercolors, the more confident and skilled you’ll become at fixing those inevitable mishaps.
So, feel free to make mistakes. Embrace them, learn from them, and turn them into opportunities for growth and creativity. With patience, persistence, and a positive attitude, you’ll soon find that watercolor mistakes are no longer a setback but an integral part of your artistic journey. Keep painting, and enjoy the process!